Thursday, December 29, 2011

Nut So Fried Chicken

As you well know, I am from the south. And in the south, we eat fried chicken. In fact, we consider good fried chicken to be a form of art! And I happened to grow up with the cookin-est southern momma you can imagine. So we frequently ate fried chicken. I happen to believe hers is the best you can find anywhere and I’d place that bet for any amount of money on any day. We gamble in the south too….you’ve probably heard of the Kentucky Derby! That said, I must admit that I absolutely looooove fried chicken. Well, let me amend that. I love my momma’s fried chicken. This chicken and waffle trend up here in New England is fine, but the chicken just aint the same!

The problem is that…oh yeah….it’s FRIED CHICKEN! And besides the fact that I won’t make it because it’ll never taste like my momma’s, its just BAD BAD BAD for your heart, no matter how good it may be for your soul! So I’m regularly thinking of making yummy oven baked “fried” chicken. Unfortunately, I usually feel pretty luke warm about the end result and I’m so partial to the grill that I usually just don’t bother.

However, last week in my organics box, I added some locally grown pecans! I’m a nut freak so there you go. And what we ended up with friends was a spectacular, yes, spectacular oven “fried” chicken BREAST. Finally!

Here’s the breakdown:

½ cup pecans
¼ cup bread crumbs
*toast some wheat bread to make them
¼ tsp crushed red peppers
zest of one Clementine
½ tsp salt

2 chicken breasts
1 egg white
2 Tbsp water
olive oil cooking spray

Preheat your oven to 425 degrees. Put the first 5 ingredients into a food processor and process it until it is thin. Pour into a pie pan or something similar. Mix the egg white and water also into a pie pan. Cut each chicken breast in half horizontally to make two thin pieces. Dip the chicken in the egg mix and then the pecan mix. Spray a cookie sheet with olive oil spray, place the chicken on the cookie sheet and spray a little of the olive oil on top of the chicken. Bake for 20 minutes flipping them half way through.

I also received in this box some locally grown baby brussel sprouts. If they are big sprouts, I usually cut them in half, but not the babies. I typically roast my brussel sprouts with olive oil and a little s&p. I adore them and can pretty much eat them anyway you wanna serve them to me. Josh on the other hand, does not like my recipe! Don’t kill him friends, he eats them anyway because of my insistence that they’re super good for you. However, my friend Gregory fed them to him one night and he came home raving. Ok Gregory, what did you do? The secret….herbs de provence. Gregory lets them sit in olive oil, s&p and herbs de provence for a while before he roasts them. Well that’s easy, please and thank you!


So that’s what I did and booooy was Josh right. They were so amazing! If you think you don’t like brussel sprouts, I challenge you to try these and not like them! Rule of thumb, roast ALL vegetables at 425 degrees for 18 minutes! The will ALWAYS come out perfect. Promise! So this works out perfectly, just put them in at the same time as the chicken. I also served this with a bit of greens. 


Now let me push the brussel sprouts to you for another reason. They are GOOD FOR YOU!

Brussels sprouts are high in protein, accounting for more than a quarter of their calories. They are loaded with vitamin A, folacin, potassium, and calcium. They are high in fiber making them one of those foods that will fill you up and keep you trim. Brussels sprouts are also rich in vitamin C, an anti-cancer agent.


One of My Fab Christmas Presents!
So eat ‘em up friends and buy them locally if you can!  

Monday, December 26, 2011

All Aboard the Breakfast Train


Breathe in…..haaaaaaaa! If you yoga, you know this sound! If you don’t, get to yoga, this sound will make you happy! That’s how I feel friends. I am done with the super cleanse. Feeling great and eating stuff I can share with you! I hear cheers from the peanut gallery! Or maybe it’s just in my head! Either way, I’m blogging today to pass along my new found respect for breakfast and give you a yummy suggestion.

So as I said in my cleanse blogs, I’ve learned by doing that breakfast is indeed, the most important meal of the day. I have also learned from my trainer’s constant reiteration and from doing the cleanse, that carbs in the morning may be the best time to eat them (and around your workouts). And I do like the idea of carbs in the morning. Whole carbs that is, not white bread toast or donuts!

Despite the fact that I’m on the bandwagon with this, I am still not a huge fan of atypical breakfast foods. I know people that LOVE breakfast….I think these people are freaks! *wink wink So I wanted to share two breakfasts I’ve recently eaten and pretty much loved. Whaaaaaat? I am a changed woman!

The first one I actually stole from Men’s Health Magazine. It is a breakfast sandwich that I can actually feel working in my body if I eat it just before my workout. They call it apple jacked; I call it delicioso!

Here’s the breakdown:
1 Whole Wheat English Muffin, toasted
2-3 Slices Canadian Bacon, warmed in the skillet
1-2 Tbsp Peanut Butter, Crunchy if you’re me!
*I mean the kind that is ground up peanuts w/out salt or sugar, I use Teddie brand
¼ to ½ green apple sliced 


Stack this up however makes sense to you and enjoy! It sounds weird to you, I know, but trust me…it is crazy delicious. Might even make Elvis proud!


The second breakfast suggestion I have for you is eggs. Now, when I tell you that pre-cleanse, I NEVER ate eggs for breakfast. Maaaaybe once or twice a month. But I’m a believer in the incredible edible egg and I’ve been alternating days of eating eggs.

Here’s the breakdown:
2 eggs, beaten
1 Tbsp Orange Pepper, diced
1 Tsp Onion, diced
1 Handful Grape tomatoes, quartered
2 Slices Canadian Bacon, diced
½ Handful Fresh Cilantro
Olive Oil Spray

2 Small Potatoes, sliced very thin
Borsari Seasoning
Pepper
Garlic Powder
Cayenne Pepper

Preheat oven to 425 degrees. Microwave the potato slices for about 4 minutes to get them cooked. Then place them on a baking sheet in a single layer. Spray with a tiny bit of oil spray (DO NOT USE TOO MUCH) and sprinkle with borsari seasoning (reference my 10/20/11 Pork Tenderloin & Apples if you don’t know what it is/looks like/where to get it), pepper, garlic powder and cayenne pepper. Roast them for about 30 minutes or until brown. Sauté the orange pepper, onion, tomatoes and Canadian bacon in a smidge of oil spray for about 3 minutes. Remove from skillet. Lightly coat small skillet with oil spray. Over medium-low (more low than medium) cook eggs, pushing sides in and allowing uncooked egg to reach the pan. Flip your omelet, turn off the heat and add your veggie/Canadian bacon mix. Let sit on hot pan for about 2 minutes. Fold egg over mixture and put on plate with fresh cilantro sprinkles on top. Serve with half the potatoes.

All aboard the breakfast train friends! And I’m all ears for suggestions on yummy breakfasts that you love. Email me your faves and if I love them, I’ll totally blog them!

Sleep and wake well all!!!

Wednesday, December 21, 2011

Spicy Turkey


Well, I’ve rejoined the population of people who choose their own meals. So I’m trying to practice some of the stuff I learned from my cleanse in my everyday! But I’m back in the kitchen and happy as a clam about it. I forgot how much joy cooking and feeding people really gives me!

You can only imagine what my grocery trip was like last weekend. I was picking up anything and everything (health food of course, no blue box mac n cheese)! Blackberries, fish, papayas, apples, carrots, Brussels, carrots, whole wheat English muffins, eggs…should I keep going? Anyway, I really enjoy burgers and turkey burgers and we actually already had some ground turkey in the freezer. So I found a Rachael Ray (don’t judge me) recipe and prepped it a night in advance to give the flavors time to marry. It was for a “jerky turkey burger” so it had jerk flavors in it. I was super excited to have something very spicy in the que! I may not have mentioned, but I’m not a sweets eater. Spicy, however, is my addiction! So Ms. Ray uses jalapenos in her recipe….I replaced it with habanero and I suggest you do the same!

Turkey Burger
1 1/3 package ground turkey breast
1 garlic clove, minced
2 scallions, thinly sliced
1/2 habanero pepper, minced
1” ginger root, grated
1 tsp ground thyme
1 tsp allspice
1/2 teaspoon nutmeg
1 tsp black pepper
Kosher salt
olive oil
1 ripe lime, juiced
Greens or whole wheat bun

Papaya Salsa
1 large, ripe papaya, seeded, peeled and diced
1/2 red bell pepper, diced
1/4 red onion, finely chopped
1/2 habanero pepper, minced
2 tablespoons fresh cilantro
1 navel orange, juiced
Coarse salt

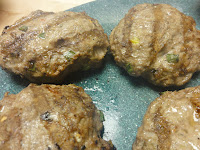
Combine the turkey, garlic, scallions, ginger, thyme, allspice, nutmeg, salt and habanero pepper in a medium bowl. Let this sit overnight. Form mixture into 4 large patties. Drizzle the patties with a touch of oil. Grill patties on screaming hot grill for approximately 6 minutes per side. Squeeze the juice of 1 ripe lime over the patties before removing them from the heat.

Combine the papaya, red bell pepper, red onion, habanero pepper, cilantro and orange juice in a bowl. Season salsa with salt, to your taste. This can sit overnight as well if you want a super quick meal the next night!

So in my attempt to rethink when, what and how I eat carbs, I decided to have this turkey burger on a bed of greens instead of a bun. Josh ate the bun. Stack them up anyway you want, either way it was delicious! Put lots of the salsa on top of your burger! It’ll burn so good! The meal was fabulously spicy and I felt great afterwards.

My Dinner
Josh's dinner


Salud friends! Yay Food!

Saturday, December 17, 2011

The New Meags....Day 21!

When I began Bryen Pinkard’s 21 Day Cleanse, I was only a couple pounds over the weight I wanted to be. I am lucky enough to have loads of friends and loved ones that regularly tell me I’m beautiful. So in my mind, I wanted to tone up, get healthy and be a happier me! But when I decided to commit to this, I had NO IDEA that the results would be what they were. I’ve said before that I have an abnormal amount of self esteem, but now….FUGETABOUTIT! I’m elated with my results and my new body!

So let me first break it down a bit since I think it would be helpful for anyone thinking about improving their health and body to know exactly what you’re in for.

As I said before, the first week of the cleanse was the most physically challenging for me. I was eating so much over and over that the gag reflex kicked in early and a few of those meals I was literally choking down. Not because they tasted bad, but because I had eaten them the day before and the day before. So when you go into Week 1, know this and be prepared physically to eat…and I mean a lot of chewing too! You’ll know why when you purchase the Cleanse yourself.

Week 2 was better for me. It was less food. Still enough food, but not so much and a “special brew” that was really delightful for me. I’d say Week 2 was the easiest week. I had all my energy and then some and was not so bored with food. Plus the results at the end of Week 2 had me REVVED UP! I could see my body taking a different shape.

Week 3 was a completely different type of challenge. Mentally, Week 3 is killer. DON’T MISTAKE WHAT I’M SAYING….it is totally doable! Remember, I’m a foodie! I love to eat and I love food! However, mentally you have to get yourself around a lot in Week 3. I can’t give too much away about what I was eating, but suffice to say it was far less than what I normally eat. BUT…I wasn’t hungry. That was the most baffling thing for me. When I got hungry, there was a remedy and I was fine. But I was third party to a mind against body battle! My head was telling me something totally different from my body. Which I find very interesting…my mind needed to be retrained.

I continued through my workouts in Week 3. My awesome trainer, Anthony Ortiz, modified my workouts a bit to match my energy levels in Week 3, but as far as I’m concerned, we both did a great job! P.S. If you live in the Boston area and are interested in getting in better shape, you definitely need to get in touch with him. www.topperformancefitness.com. I did not do any yoga in Week 3. Partly because my new job made it tough to find time for workouts and yoga and partly because I do yoga in a 90 degree room, and I didn’t want to push it too much in that kind of heat. I probably would have been fine, but…it is what it is.

So how do I feel three weeks later? I feel happy, I feel healthy, I feel TERRIFIC! Seriously. My body feels, for lack of better word, cleansed. I actually feel healthier, my energy levels are high and my focus is much better. I’m thinking more clearly and I’m effin happy! So how’s that for results?

So what am I going to do now? Honestly, it’s a scary to be back to choosing my own food besides the fact that I’m ready to eat it. I know I need to change my eating a bit to keep my body feeling and looking this good. So what have I learned and how will I apply it? The first and most important thing is that motivation and determination always breed success! Period. No one will ever convince me otherwise. I have reached a goal I didn’t even know was possible. The other thing I’ve learned is that I’m not eating a proper breakfast. I always thought, for reasons unknown, that breakfast was supposed to be small. On average, I was consuming around 150 calorie breakfasts. I’m over that. I learned by doing that having your calories and carbs in the morning fuels you for your day. In addition to that, you burn those calories all day rather than right before you go to bed! I would not be telling you this if my body did not just prove the benefits of a proper breakfast. I realize this seems like common sense, but you ask 10 people what they eat for breakfast and I bet most people are either not eating enough or are choosing unhealthy breakfast foods.

So Mr. Pinkard, I believe you’ve got a winning, fail proof way to get healthy and bring your fitness to another level. I think you are undercharging for the product you have. (Just $19.99 on www.bryensbootcamp.blogspot.com ) Here’s my problem with your system. After the 3 weeks, I have a new and improved body and a new attitude, but no idea why it worked. I don’t know what foods are doing what to my body and why. I don’t really know the concept behind it, which would allow me to carry on in my regular life. So my challenge to you Bryen Pinkard, is to charge an extra $5.00 and give your customers an explanation of what the foods are doing for them and why. Tell us how to continue in our lives and help create a cult of people dedicated to getting and STAYING in top shape and health!

So back to me! It’s confidence, not cockiness! I weighed in at the end of 21 days at 108 pounds. My body fat percentage came in at 20.3 and my body mass index at 20.5. If you remember from my first blog, I weighed 117 with a body fat percentage of 24.2 and a body mass index of 22.1. Let me do this math for you. That comes out to:

Weight loss:          9 pounds
Body fat loss:        3.9%
BMI reduction:     1.6

HELLO! I lost almost 4% of my body fat in THREE WEEKS!

So here’s the part you’ve been waiting for. Before & After Pics. Click on them for bigger images. You’ll notice my change in sports bra. This is because the white one is now so big it completely defeats the purpose of a SPORTS bra!

Before Front

After Front


Before Back

After Back


Before Side


After Side

So thank you to everyone who supported me through this. Josh my husband, who supported me through the challenges and was my personal cheerleader. Bryen, for coming up with this amazing tool that I’ll use for the rest of my life. Anthony Ortiz, who pushed me physically to be my best even when I whole-heartedly resisted! And thanks to everyone who gave me encouraging words. If you plan to do this cleanse, get yourself a support system in place…IT JUST WORKS!

I’m happy as a clam and why shouldn’t I be?

And good luck to all you future 21 Day Cleansers! If you’re not sold by now, you never will be!


Saturday, December 10, 2011

Cleanse Day 15


I’m on my way to the seamstress I normally avoid like the plague due to her constant yelling at me with regards to my desired pant length! You’re probably asking yourself why I would willingly do this to myself. Two weeks and one day ago I bought a gorgeous lace teal dress for the holiday party I’m attending on December 17. Today it does not fit!

I have just completed Week Two and I’m totally fired up. I weighed myself this morning and I’m down 8 pounds total weighing in at a whopping 109! Today I am celebrating this figure. Partly because it’s a total loss of 2 pounds for the week and not quite as daunting as the 6 I lost last week!

There have been some major challenges this week. You may not know this about me, but I’m pretty social. Typically that presents itself as drinks or dinner out with friends or drinks and some kind of activity. Drinks and dinner is really no longer an option, so last Saturday I was dying to get out of the house. I suggested bowling at this fabulous candlepin bowling alley that also makes terrific flatbread pizza. I looked at their menu and they had a raw veggie salad that I could eat. Josh and I invited our friend Ray and it was done and done. We get there and take a seat at the bar. Josh has a beer, I have a water. Josh orders a pizza, I order a salad. Mentally I’m fine until the point that Josh leans over and proceeds to moan and tell me how delicious his pizza is! Oooooook well that sucked! But I didn’t give in knowing that I was going to have some fun as soon as we got to the bowling! And it was fine. Then on Monday I started my new job with the American Cancer Society. They all wanted to take me out to lunch and what a sweet gesture: I could not turn them down. So I thought about it and had a raw salad even though that was supposed to be my dinner. I ended up just having the lunch food for dinner. Then on Friday my office had their holiday party. They had Chinese food and a cookie swap. I had my regularly scheduled lunch. But since I work with the most fabulous people they were very supportive and inquired about the cleanse. Which was super helpful and I consider myself lucky to have been in their company circumstances as they were! I did partake in the cookie swap, but I just bundled my cookies up real tight and I’ll have a few of them post-cleanse!

That brings us to today. Three days this week I added a piece of whole wheat toast and Teddie unsalted peanut butter because I was so worried about the extreme weight loss from the first week. So when I woke up this morning, I fully expected to have gained a pound or two despite the fact that I’m feeling trimmer. Well friends, I was wrong wrong wrong wrong! I had lost two, as mentioned earlier. The results are now what is keeping me motivated and I think Week Three is going to be a BREEEEEEEZE! On the cleanse document, Bryen mentions that week three is the hardest, but in my case I think he’s going to be wrong here! I’m pumped! 

So lets talk about my workouts. I’m still working out as scheduled. And in my workout this morning, I maxed out at 145 pounds in my deadlift. In case you are not great at math, that’s well over 100% of my body weight! I’m getting stronger. Now, part of this has to be attributed to my trainer and his hard work getting me here. But I think my body just feels so great that it’s allowing me to really push myself physically in the gym!

Here’s the other new and most exciting part of this for me! My back fat is gone (in appearance, I have not measured it)! For whatever reason I carry a lot of my body fat in my back, you know where I’m talking ladies. Right where your bra wraps around you! I used to be so embarrassed and self-conscious about this part of my body. I have an abnormal amount of self-esteem, but this was always something challenging for me! Well bye bye back fat! And hello new attitude! I promise to be the sweet and kind person I always was, but there’s definitely a little hitch in my giddy-up!

Well that’s about it! Bring it Week 3!!


Saturday, December 3, 2011

Cleanse Day 7


Welcome back beloved readers to Diary of A Girl on the 21 Day Cleanse! I have just completed DAY 7 and I’m feeling incredible! I have stuck loyally to the cleanse as instructed with a little mustard or salsa (just a teeny bit for taste)! As you know from my last blog entry, I’m tired of eating the same thing. Now, to Bryen Pinkard’s credit, I understand that 21 days of exciting menus is not only difficult but slightly contrary to the point. So I’m taking it in stride, as I typically don’t even eat leftovers the next day, but wait a day to do so!

I have also been loyal to my workout routine. Training regularly with my trainer, doing yoga and I’m doing some cardio on my own on the off/yoga days. Jump roping mostly because I’ve sworn off the BSC and anyway I can jump rope right in my own apartment! Imagine the horror of the neighbors below! Luckily because of all the box jumps I’ve been forced to do since commencing training with a professional, I know how to land like a cat!!

In my first week I noticed some major changes in my life! The first thing would be the way I feel. Unfortunately, its difficult to describe, but generally I feel energized, healthy and I’m not getting hungry! That is the most amazing thing to me. I’m eating the proper calories, according to Bryen, but because the foods are “whole” and therefore, more satisfying. I’m even having to remind myself that its time to eat!

The other thing I’m noticing is my energy levels and ability to continue with my workouts. Initially, I assumed I’d be too tired to carry on as normal. However, I’m doing fine. In fact, in my session yesterday morning it appeared that I am stronger and more focused. I attribute this to breakfast! In the past I would have a greek yogurt and some granola for breakfast. I am now having a much more complete breakfast and apparently it’s giving me the energy I need to perform during my workouts. Who would have thought my trainer and friend (who is also a trainer is Cali) would be right when preaching to me to eat more breakfast! Give me a break! I’m a Spencer, stubbornness runs in my family!

I will say I’m glad to be done with week one. I’m tired of the food and actually looking forward to next week’s schedule. Mostly b/c there’s a variation on breakfast and my favorite thing from week 1’s breakfast is now part of my lunch!

As far as body image goes I’m feeling trimmer and Josh, my husband, is noticing a difference just looking at me. Which is really saying something since he sees me everyday! And regardless of how interested you are in getting healthier, there’s no motivation like seeing your body get sexier!

So I weighed in this morning and I came in at 111 pounds. This is a total of 6 pounds for week one. This is absolutely an incredible result. However, my first reaction was to be a bit concerned that I’m losing more weight than I want to. I have to believe that my body is going to stop losing weight when it needs to, but 111 is one pound less that my original trainer suggested I should weigh. Funny thing is, at that time I weighed 128 pounds and I laughed at him! 

I'm thinking about adding a piece of wheat toast with natural peanut butter to my breakfast a few times this week to add some healthy calories. We'll see, I'll let ya know!

Monday, November 28, 2011

Cleanse Day Three


Day Three is completed. I feel amazing. Apparently I had a bunch of junk in my system and the cleanse is getting my body back to home base! I do not feel starved, as I am eating several times per day. Its very interesting to me that the breakfast on the cleanse is about 3x the calories I normally eat for breakfast. I have a bit of a hard time getting it all down as I’m really not a breakfast person, but its fueling me for the rest of my day. Interestingly enough, it’s a bigger lunch than I normally eat as well. The switcheroo for me is dinner. I’m used to big dinners and this definitely does not have a large dinner.

I’m finding myself drinking more water than normal. I think it might have something to do with the foods I’m eating and the fact that I’m eating the same things over and over, so I’m washing it down as they are beginning to get old. (Aiaiaiiiaaaii we’re only at day 3) but I can do anything for a week! Additionally, I’m kind of understanding the work that went into creating the cleanse. I am trying to find nutritional substitutes for some of the foods that I’m getting sick of and there just aren’t any. I figure if Google can’t give me an answer there isn’t one!

So here’s the big news. I weighed myself this morning and I’m down 2.5 pounds! Now, I’m not looking to lose a ton of weight. I think at most I’ll be around 5 pounds for the 3 weeks. The result I’m looking for is toning up my body after I get those few extra pounds off.

We’ll see how that goes, but for now so far so good.

Saturday, November 26, 2011

21 Days! Day Uno!


Dear Readers,

For the next three weeks, I will not be posting any recipes. I apologize for this. The reason is that I am embarking on a journey that has taken me a long time to muster up the courage to do. Last year right about this time, college friend and personal trainer in Louisville, Bryen Pinkard, sent me his 21 day cleanse. Rather, I purchased it as his blood sweat and tears have gone into creating this system! This is a food regime that is meant to be combined with a regular workout schedule. At the time, I don’t think I was really prepared to do it. It requires a great amount of discipline and dedication to yourself and I just wasn’t ready for the diet portion of it. But a year has passed and my body and mind are both ready to try this out. The ridiculous results his clients are getting may have also fueled some of my motivation. You may not know this about me but I’m almost as dedicated to my fitness as I am cooking! Almost!!!

So for the next three weeks I’m going to track my progress with numbers, pictures and how I’m feeling about the whole thing. I’m going to use my blog as a diary, if you will. That way anyone who reads this and is interested in doing the same can know what you’re in for! I cannot divulge what I’m eating, but you can purchase the cleanse for yourself on www.bryensbootcamp.blogspot.com. I will be assisting the diet with my regularly scheduled working out and yoga combination!

If this gets too boring for you, I’m sorry and please do start reading again around Christmas. I’ll be done with the cleanse on December 17, 2011 and back to blogging as normal.

So lets get started. Today is November 26, 2011 and I currently stand at a whopping 5’1” tall and 117 pounds. My body fat percentage is 24.2% and my BMI is 22.1. It is Day 1 of 21 of the cleanse. Wish me luck!

Monday, November 21, 2011

UK Pizza


Alright friends. You may have noticed a lack of Sunday night blog! If you are my Facebook friend, you may know why. It’s because I had tickets to Kentucky’s basketball game on Sunday at Mohegan Sun. This is a 2 hour(ish) ride to the casino and 2(ish) more back. If you did not attend the University of Kentucky, you may wonder why someone would make a 4 hour trip for a 2 hour game. For those of you who do not understand, let me try to explain. “In Kentucky we care more about basketball than you do. In fact, we care more about basketball than you probably care about anything. No program’s fans in America are more committed, passionate, or crazy than those of the Big Blue Nation.”
-Matt Jones  

Suffice to say that when Kentucky’s in town (or near town) I’m headed that way with my big blue wig and an unbridled spirit. My apologies, dedicated readers, but in a contest against UK Basketball, you lose 100 times out of 100; love you as I do!  


That said, I did make a HUGE meal for my friends on Saturday night that I would like to share one of my dishes from. I was hosting friends for a GIGANTIC Italian meal (thank you Capone’s). When planning the meal I originally thought of making garlic bread. But it seemed a bit boring to me and I was in need of an extra appetizer. Boston Organics recently had a squash pizza in their newsletter, so I tried it.

Here’s the breakdown:

1 whole wheat Boboli pizza crust
*You can make your own, but I don’t have the stamina
½ butternut squash, roasted
2 onions, caramelized
fat free milk
goat cheese
parmesan cheese
yellow curry powder
s&p

To caramelize your onions, slice them pretty thin. In a skillet sauté them with olive oil and salt over medium-low heat, stirring every 10 minutes or so until they are a brown caramelized color. *Note, this will take a long time! Probably the better part of an hour. Peel and cut up your squash into 1” pieces. Coat lightly in olive oil and salt and pepper. Roast at 425 degrees for about 45 minutes or until soft. Mix squash with an electric mixer or blender adding milk until the consistency is smooth. Sprinkle in 1-2 tsp yellow curry powder and mix in. I would suggest if you’re planning to make this do these steps in advance when you have time. To construct the pizza, spread the squash on the crust. Add the caramelized onions evenly. Salt and pepper the pizza. Sprinkle with crumbles of goat cheese, not to cover the pizza, just to evenly disburse. Sprinkle (or shred if you have a block) parmesan on top. Bake at 450 degrees for about 18 minutes. The cheese isn’t really going to melt, but make sure its hot!

Unfortunately I do not have an image for you as we ate it very quickly. But know that this pizza was a huge success and a favorite part of the meal for me! Additionally, you don’t need that much cheese to get the flavor you want, so tone it back and keep it quasi healthy! 

And just incase you’d like to check out what all the hype is about, Kentucky plays again Wednesday night at 7:00pm ET! I think it’ll be ESPN3.

Go Cats!!

Thursday, November 17, 2011

Book Club Pie!!

After I decided not to subject my poor book clubbers to an experimental meatloaf, I found myself trying to figure out what I could cook them. I needed to make something large enough to feed a big group, but I didn’t want to make pasta. I also didn’t want dinner to take forever to make. So what on earth could I make, besides a meatloaf that meets all the criteria? While reading through Real Simple, I found a recipe for mushroom pot pie. I decided that sounded somewhat easy and I could triple(ish) the recipe which made enough to feed four people. I had never made a homemade pot pie in my life. Josh and I always eat the ones from the frozen foods section but not often because they are TERRIBLE for you! But I’m certainly not one to back down from a challenge, so chicken and mushroom pot pie it was!

I’m going to call this recipe my own because I changed the recipe all around to be the taste I want, as I often do with recipes. It’s more about getting an idea and then making it my own. So this recipe called for frozen peas, which absolutely makes my skin crawl. I replaced that ingredient with frozen okra. It didn’t call for chicken, but I as much as I love veggies, I didn’t see veggie pot pie really doing it for me or my girls! I also thought the amount of other veggies would end up being too much so I cut some of them down. At the end I had a hybrid between Real Simple and Marie Calendar’s!

Here’s the breakdown:

2.5 pounds mushrooms
*I used baby bellas and white stuffing
1 rotisserie chicken, chopped into ¼” pieces
*Pick this up at your grocery already cooked, trust me!
8 carrots, cut in ¼” pieces
7 celery stalks, sliced in ¼” pieces
2 onions, roughly chopped
1 lb frozen okra
1.5 tsp dried thyme
½ tsp salt
¼ tsp pepper
2/3 cup all-purpose flour
2 sheets puff pastry
3 cups chicken stock
2 Tbsp olive oil

Chicken & Veggie Mix
Preheat your oven to 400 degrees. Heat olive oil in a dutch oven. Add the mushrooms, carrots, celery, onion, thyme, salt and pepper. Cook covered, stirring occasionally until the veggies are tender. About 20 minutes.  Add the okra and chicken. Cook just for a few minutes until heated. Add flour and cook, stirring until well mixed. You don’t want to see pieces of flour! Add the broth 1 cup at a time, stirring. You may not need all 3 cups, but you want the texture to be like thin gravy (not soup broth). You cannot add more flour if you add too much broth, so go slowly. Bring to a boil. Once everything is hot pour the mixture into 1-9x13” and 1-8x8” baking dish. One puff pastry covers more than the 8x8” pan. Cut off the edges to put on the other dish as 1 pastry won’t cover a 9x13”. Then cover the other using the other puff pastry and the remains of the first one. Bake both for approximately 30 minutes, but make sure the pastry is brown before you take them out. It may take 40 minutes. Let the pot pies rest for 15 minutes before serving.

Finished Product!


It was a rainy cold mess last night, so the weather was perfect for comfort food! Dinner was a big hit. The girls liked it and so did I! It was also perfect for a group and you could even take the leftover of your big bird next week and it would be an equally good way to get rid of all that extra turkey you know you’re going to have!

Cheers!

Sunday, November 13, 2011

Gobble Gobble Meatloaf


This month I am hosting book club at my house. It is scheduled for November 16 (next week). Since book club was so close to Turkey Day I thought I’d modify typical Thanksgiving day fare for my book club girls. Here’s my thing. One year, longer ago than I care to admit, I made Thanksgiving dinner for Josh and his roommate. I basted and cooked and stuffed this turkey until I was literally passed out on the couch from exhaustion! After all this labor, I realized that turkey is a ridiculous amount of work and it isn’t even my favorite part of the meal! Seems stupid to me to work yourself to death for something you don’t really love anyway. So my mind started working on how to modify turkey for those of us that really couldn’t care less about the stupid bird! That’s when I thought of turkey meatloaf. I make a very typical turkey meatloaf pretty regularly but what if THIS meatloaf was Thanksgiving style???? And what if this “turkey” was still stuffed and had all the fixins but modified to be just a bit healthier!?!? Genius or madness? I’ll let you decide. What I will say is that this blog pre-dates my book club because I didn’t want to subject a whole room of people to something that could turn out disastrously!

This dinner has several parts to it and while most of my blog posts don’t usually take very long to make, this is definitely a Sunday nighter because it takes a bit longer.

Stuffing
1 loaf bread
1 stick butter
3 stalks celery plus all the leafy parts of the stalk, chopped fine
1 small onion, chopped fine
½ of a 0.6 oz container ground sage
1½ Tbsp. pepper
1 Tbsp salt
16 oz. chicken stock, approximately

Toast the slices of bread until they are pretty dry but not crumbly (oven works best for this). Meanwhile, melt your butter with all the celery and onion in a small sauce pan. Stir, cooking over low heat until the vegetables are tender. Tear the bread slices into ½ inch size pieces, but don’t worry about uniformity. Put them in a large bowl. Sprinkle with ½ the salt and pepper and ¼ of the sage. Toss it around and sprinkle the rest of the salt and pepper and another ¼ of the sage. Pour the veggies and butter over the bread, stir around and add the rest of the sage. Add chicken stock incrementally until the consistency of the bread is quite soft. This will likely come out to around 16 oz. Let this sit in a 7x10” pan for several hours to let the flavors marry. Later bake at 350 degrees for 30 minutes.

*This is my mom’s recipe for stuffing, which was probably my grandma’s or my Aunt Sis’ and will always be my favorite!

Cranberry Fig – Real Simple Magazine
12 oz. fresh cranberries
5 oz. dried mission figs, chopped roughly
1/3 cup honey
¼ tsp. Allspice
*RS calls for Cardamom but this stuff is unreal expensive
½ tsp. salt
¼ cup orange juice
*I added this because I thought it was too thick at the end

Put all the kids into the pool (except the orange juice), bring to a boil. Stir then bring the heat to low and stir frequently until is a consistency you like and the cranberries are bursting. Stir in the orange juice and let sit at room temperature until dinner time.

Meagz Turkey Meatloaf
1 package ground turkey
*They’re usually just over a pound
Just more than 1/8 cup fresh herbs (thyme, rosemary, sage) chopped very fine
1 tsp salt
½ tsp pepper
1 egg
1/3 cup mushroom gravy (fresh from Whole Foods)
½ tsp ground sage
2 stalks of celery with leaves, chopped fine
¼ of medium onion, chopped fine
3/4 cup breadcrumbs

I want to take a moment to rave about this fresh vegan mushroom gravy from Whole Foods. It’s in the refrigerated section. I usually use BBQ sauce in my meatloaf to add moisture, but this wasn’t going to work with this flavor profile. I thought I’d add turkey gravy, but when I saw the nutrition facts for this stuff I decided on it!


Mix all the ingredients together in a bowl and let sit for several hours. When I say mix, I mean use your hands people!! After you’ve cooked your stuffing, take your meat and in rectangle form press it out flat onto a greased cutting board. Add stuffing in a log shape in the middle of the meat. You will not need all the stuffing you made. Then wrap the sides of the meat up around the stuffing to form a typical looking “loaf”. Make sure the ends are sealed up and the seam is squished together. Transfer to a 9x13” baking pan and cook at 425 degrees for 15 minutes. Turn the heat down to 350 degrees to finish cooking for 45 more minutes. Let the loaf sit for 5-10 minutes before slicing. Put slices on the plate and drizzle with the cranberry fig sauce.

*A note about why stuffing in the middle: If you’re anything like me, your favorite part of Thanksgiving is the stuffing. It’s also the least healthy thing on this menu. So putting it in the middle of the meat creates portion control and keeps me from eating a whole plate of it!


Healthy Green Bean Casserole

20 oz. fresh green beans
1 container baby bella mushrooms
¾ onion, caramelized
*do this by slicing thin, and sautéing over low heat with a little olive oil and salt
mushroom gravy (same stuff from above)
olive oil

Sauté green beans and mushrooms with a small amount of olive oil (just to keep from sticking) for about 10 minutes over medium-high heat. Meanwhile, warm the rest of the mushroom gravy in a small saucepan until heated through. When beans and mushrooms are at desired doneness (I like mine crunchy) add onions and stir together. Serve on the plate and drizzle a little of the gravy over the bean mixture.

*This is going to create the same flavors of our favorite green bean holiday dish without the unhealthy cream of mushroom soup and french fried onions!!!!

Well friends, this meal was truly delicious and I am awake to write about it! The best part is that you really can get all the flavors you love about Thanksgiving without all the guilt! I think I’ll go watch a Charlie Brown Thanksgiving!


Cheers!!

Sunday, November 6, 2011

Lemony Garlicky Shrimpy Pasta-y


Not too long ago, I discovered an amazing store in my neighborhood. I find myself regularly being pleasantly surprised with the new and fabulous businesses in Union Square. I’m pretty sure this store isn’t new, but I had not been in before. The gem I’m talking about is Capone’s. It’s a tiny little space doing huge things! The first really fabulous thing they’re doing is cutting their pasta to order fresh for you. But that’s not all. They are carrying loads of flavors of pastas to choose from. They are also carrying several varieties of sauces to go with them. In fact, they have a giant diagram of your choices. On the vertical side are the flavors of pasta you can get. Horizontally are the sauces to choose from. Then across the bottom are the varieties of cuts you can get your pasta in! In the middle the diagram shows you which pastas go best with which sauces. ITS PASTA FOR DUMMIES! Pasta Guide - CLICK ME!! They also carry ready made dinner, meats, cheeses, deserts, you get the point. I highly recommend you get yourself in there!

But for dinner the other night, I had defrosted the garlic scape pesto from another blog (the recipe that keeps on giving). I knew I wanted to grill some shrimp to go with it. So I went to Capone’s to get pasta. I told the girl I was making pesto and without blinking she told me that I needed to use lemon pasta! Perfect! It would work beautifully with shrimp too! She suggested linguine goes best with seafood. So one pound of lemon linguine and several other goodies later, I went back to the house to cook! And what an impressive Italian dinner did come of it!

Here’s the breakdown:
 
1 small eggplant
21 jumbo size raw shrimp
¾ cup pre-made garlic scape pesto
1lb. lemon linguine
handful fresh basil
s&p

Soak bamboo skewers for 30 minutes before you start cooking. Pre-heat your grill. Cut your eggplant into ½” slices. Shell the shrimp and season with salt & pepper and skewer your shrimps. Get your pasta water boiling. Start grilling your eggplant a few minutes before your shrimp. When you flip your eggplant, put the shrimp skewers on the grill. Flip your shrimp about 2 to 3 minutes after starting. They do not need long and overcooked seafood is the WORST! Dice up your eggplant and drop your pasta into the water. Put shrimp, eggplant and pesto into a sauté pan. ONLY COOK YOUR PASTA FOR 2 MINUTES! Fresh pasta doesn’t need long. After draining your pasta, throw it into the pan with the shrimp, pesto and eggplant. Toss it all together with a smidge of heat under it. Serve with a bit of fresh basil on top. Josh added fresh parmesan cheese on top, but I have a serious policy against dairy and seafood together! I also served it with lemon wedges which I squeezed over the whole dish.

It was so delicious. You could definitely taste the lemony goodness in the pasta. Besides being yummy, it was also very quick! So it makes for a great quick but very impressive dinner. We loved it! Thank you to the good folks down at Capone’s for helping this Irish girl make a lovely Italian meal!


Ciao!

Thursday, November 3, 2011

I'm Definitely LEEKIN that $*** -"Martin Lawrence"

Not too long ago I received 4 beautiful leeks in my organics box. I had heard my friends, Chris and Electra talk about how much they loved leeks at work, but never had an actual reason or desire to buy them myself. Thank you Boston Organics for, once again, forcing me out of my comfort zone. I suspect a lot of people feel the same way I do about leeks. Sure, they’re a terrific idea, but whaaaat to do with them? I know they have a oniony flavor which works great for me because I seriously love onions, but I didn’t want to waste this beautiful vegetable just chopping it up and replacing onions with it in one of my regular recipes. I wanted to showcase it.

That’s when I took a little help from Martha Stewart. I typically don’t like her recipes because they just usually seem too labor intensive for someone who’s not spending their time in an 8x8 box! But this one seemed super easy, so I went for it slightly against my own good sense.

Here’s her recipe for a delicious leek and gala apples (some of my favorite types of apples by the way) side dish.

2 Leeks, halved lengthwise and cut across in 2” pieces
4 Gala apples, cored and cut into 1/4” slices then halved crosswise
½ tsp fennel seeds
1 Tbsp honey
1 tsp red wine vinegar
1 Tbsp olive oil
s&P

Before Honey & Vinegar
Before you cook anything, make sure you separate your leek pieces and soak them in a bowl of water. Swish them around to get the sand out, drain and repeat. Leeks tend to carry a lot of dirt in them because of their layers and they way they grow. Heat olive oil over medium heat. Add leeks and fennel seeds to your pan. Stir occasionally about 5 minutes. Add apples and cook, tossing occasionally until they are tender (approximately 3 to 4 minutes). Remove from heat and stir in honey and vinegar. Sprinkle with salt and pepper.

Dearest Martha serves this with a pork tenderloin. But it was fish night in my house so I fixed one of my go to grilled fish recipes that is easy and has big flavor. I make it with yellow curry powder and
 I thought the fennel and curry would go together better for a more cohesive dinner than Martha’s pork! That’s right, I said it! And I was right!!!
Final Product


Here’s my super easy yellow curry fish recipe.

Tilapia
Curry Powder
Fresh Ginger, frozen

Sprinkle the tilapia with curry powder and grate the frozen ginger over it with a hand grater. Let it sit for a couple minutes before turning it over so the frozen ginger melts into the fish. Repeat on the other side. You can then cook your fish in whatever tool is easiest for you at the time. I like to use my indoor Cuisinart grill, but a cast iron skillet works just as well. Grill the fish until cooked through (about 4 minutes per side).

These two dishes were perfect together and I finally tamed the leek beast! So throw your leek fears to the wind and get to it friends!

Salud!